Campanelle with Broccoli Rabe and Whipped Ricotta

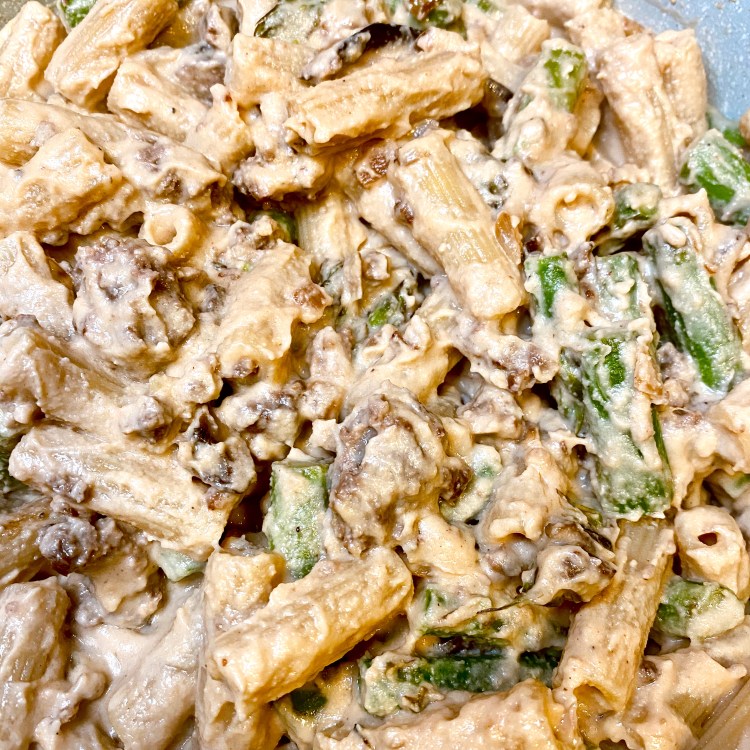
Campanelle pasta is one of my favorite pasta shapes because it really helps scoop up all the sauce, cheese, and goodness in a pasta dish like this.  Once you whip the ricotta and mix your dish together, it creates a super creamy and satisfying meal.  NOTE: I made this one using plant based smoked apple and sage sausage, but you can also use meat sausage.  I would just try to stick in the apple and sage flavor palette, or go with a plain sausage, or even ground meat.  The fresh sage is a star of this dish, and a sausage with intense flavors may overpower it.  

What you need (Serves 2): 

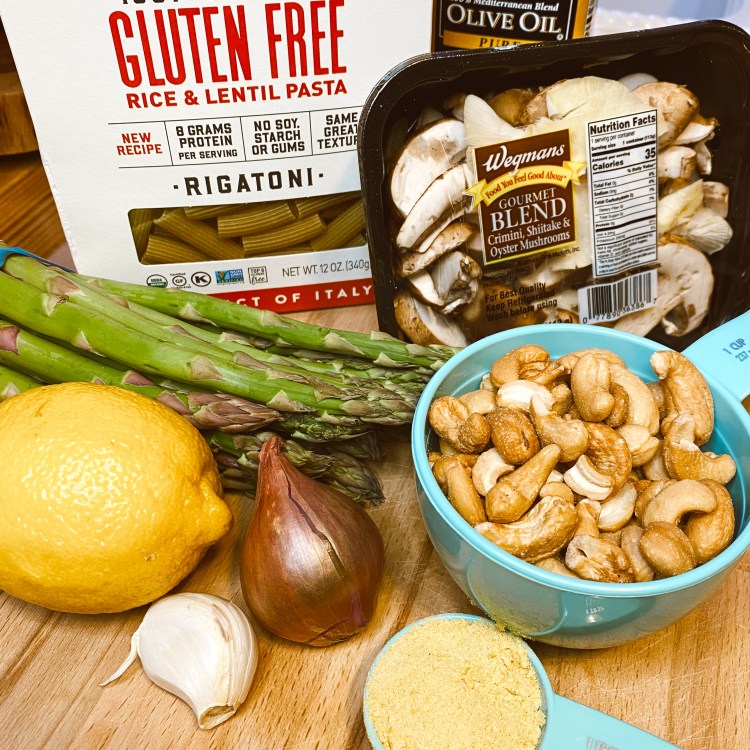
▫️ 1.5 cups (dry) campanelle pasta (or any pasta of choice)

▫️ 1 small shallot (approx. 1/4 cup chopped)

▫️ 1 link of apple sage plant based sausage (or mild flavored meat sausage of choice)

▫️  Broccoli rabe

▫️  1.5 cups whole milk ricotta 
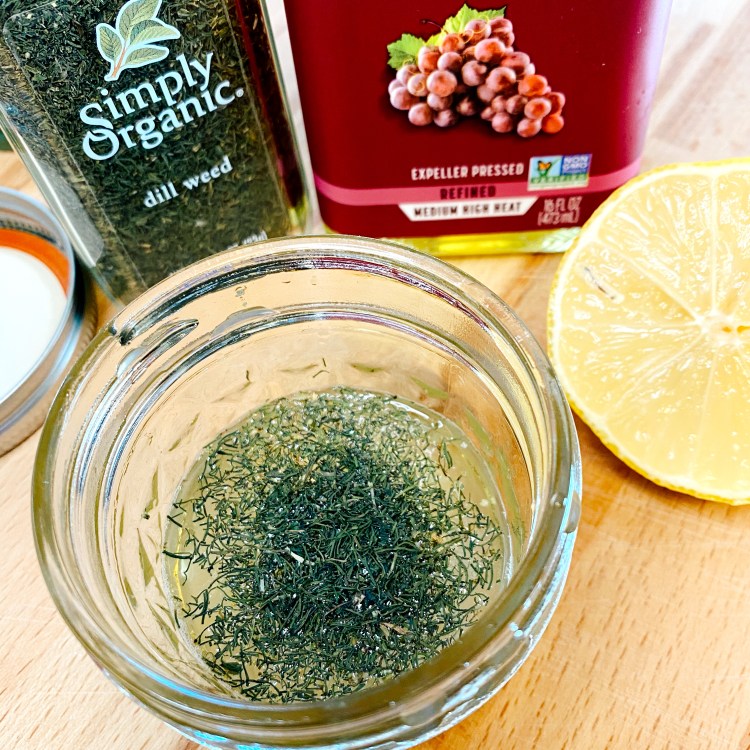
▫️  1 lemon 

▫️  Fresh sage 

▫️  Shaved parmesan cheese

▫️  Extra virgin olive oil    

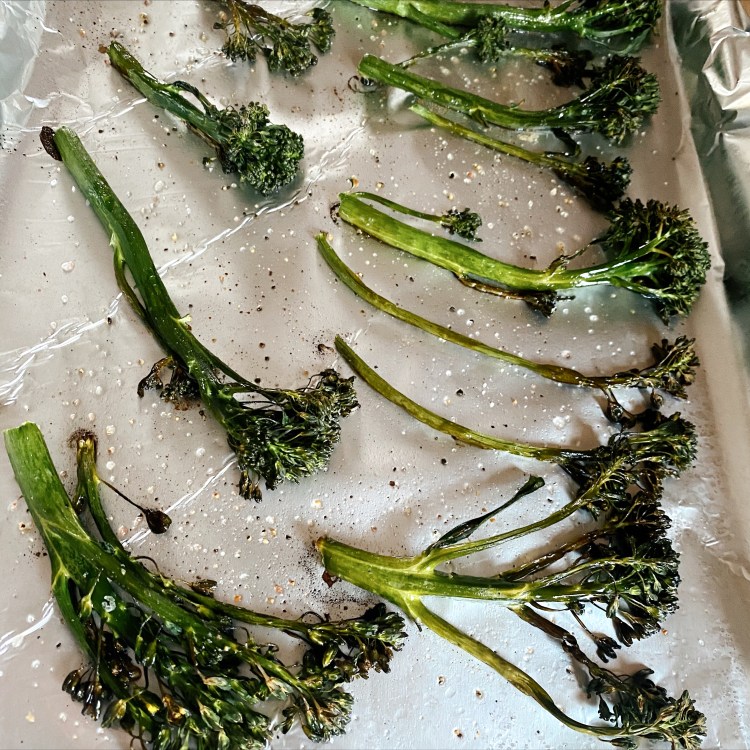
Spread broccoli rabe on a baking sheet, drizzle with olive oil and season with salt and pepper.  Roast at 350 for 15-20 minutes, or until broccoli rabe starts to look crispy.

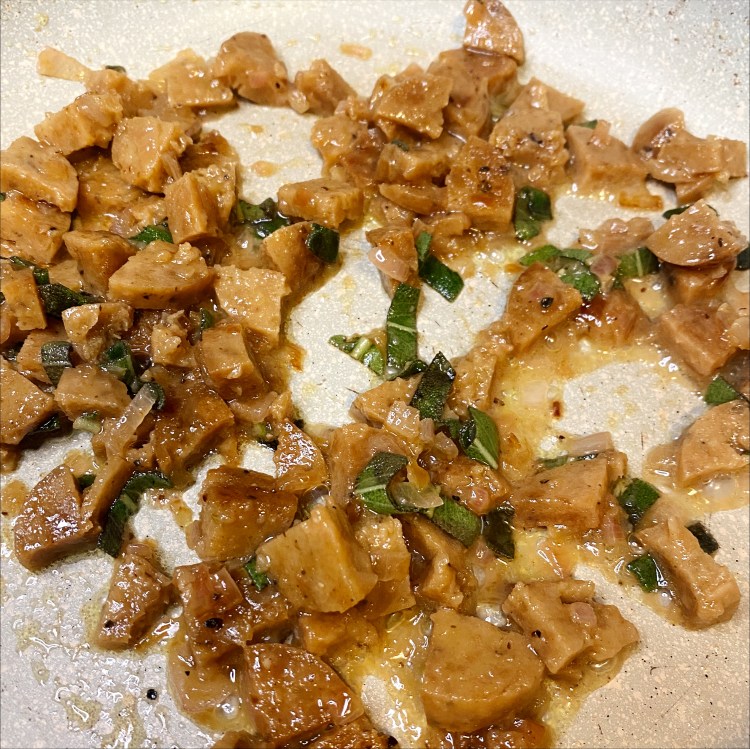
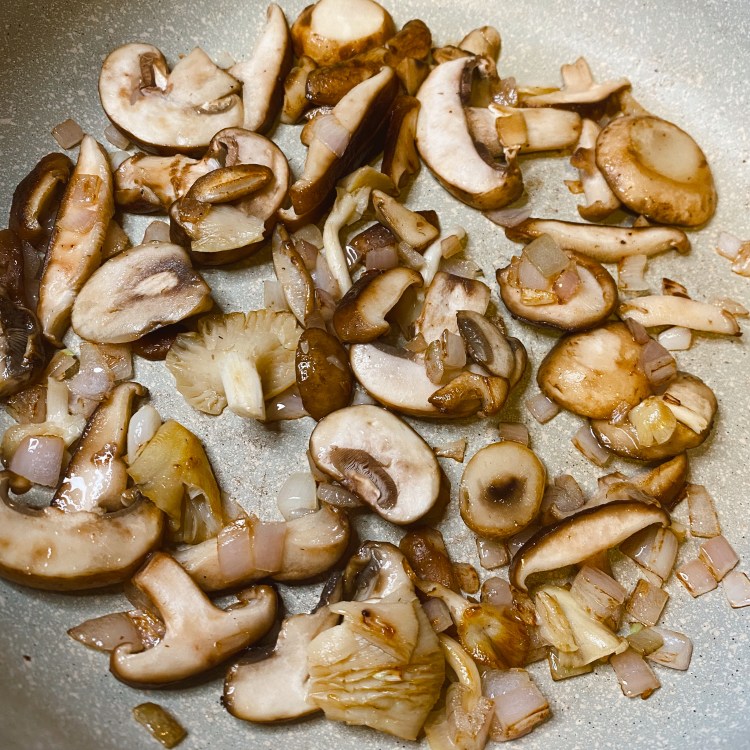
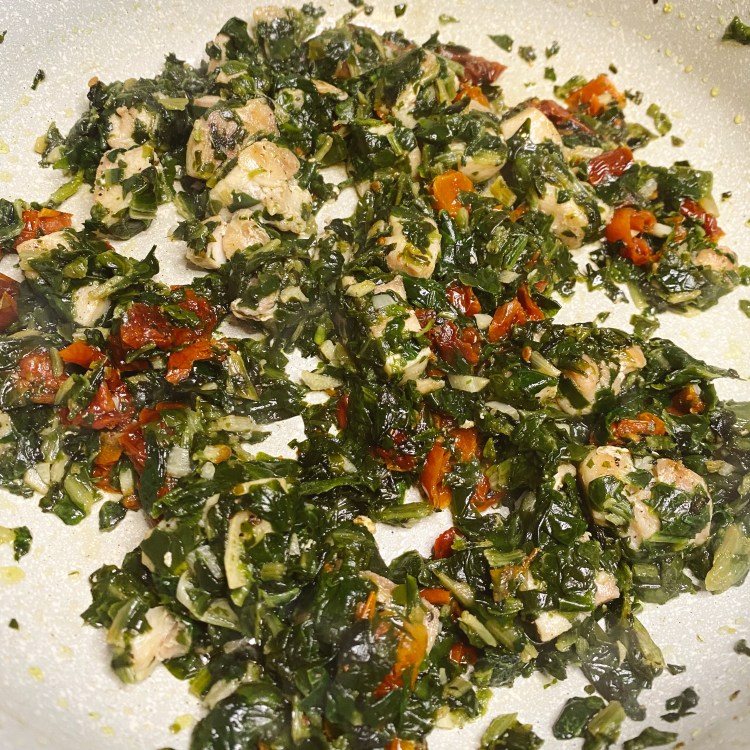
Chop shallot and sausage and cook on medium heat in 2-3 tablespoons of olive oil.  Season with salt and pepper.  

Cook pasta in boiling and salted water for approximately 10-12 minutes, or until cooked al dente (fully cooked but still firm).  

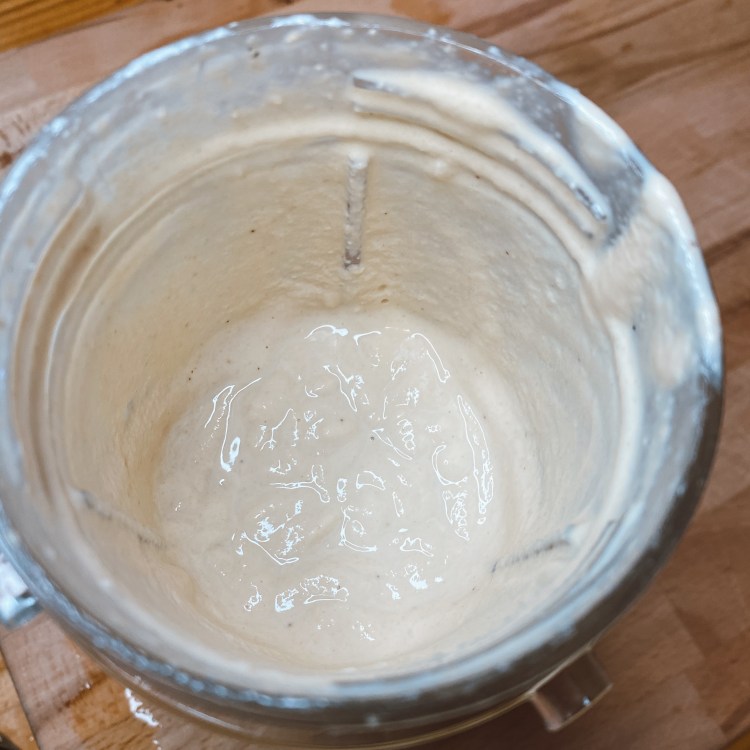
Whipped Ricotta: Place ricotta and a small squeeze of lemon juice in a food processor, blend until creamy and smooth.  Set aside until plating.  

Add most of your chopped sage into the pan with the shallot and sausage (reserve some for garnish).  Squeeze the remainder of the lemon over the mixture.  Cook until shallots are browned and sage is a little crispy.  Add a few tablespoons of pasta water before draining your cooked pasta.  

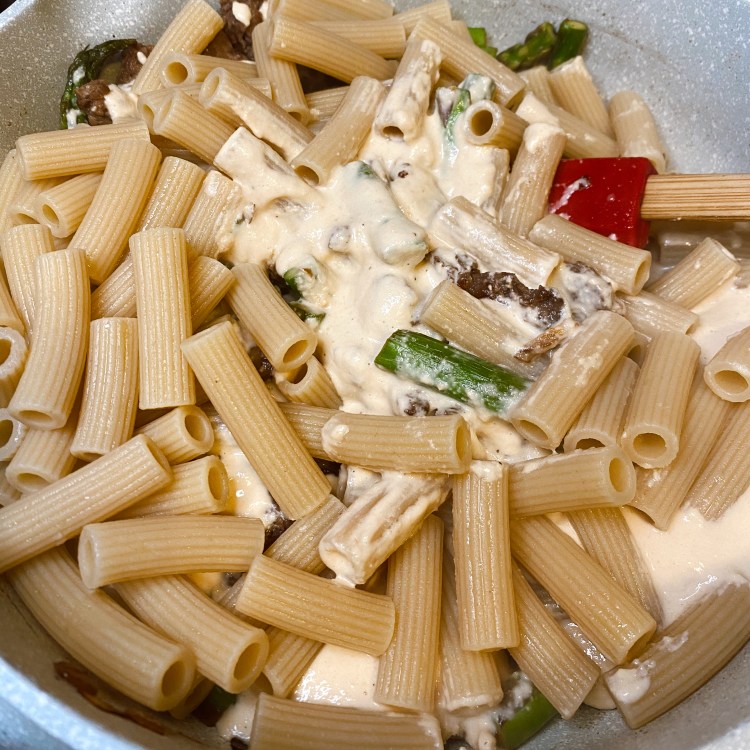
Add cooked pasta and more olive oil to your sausage and shallots and turn off heat.  Mix pasta and oil into sausage and shallot mixture.  

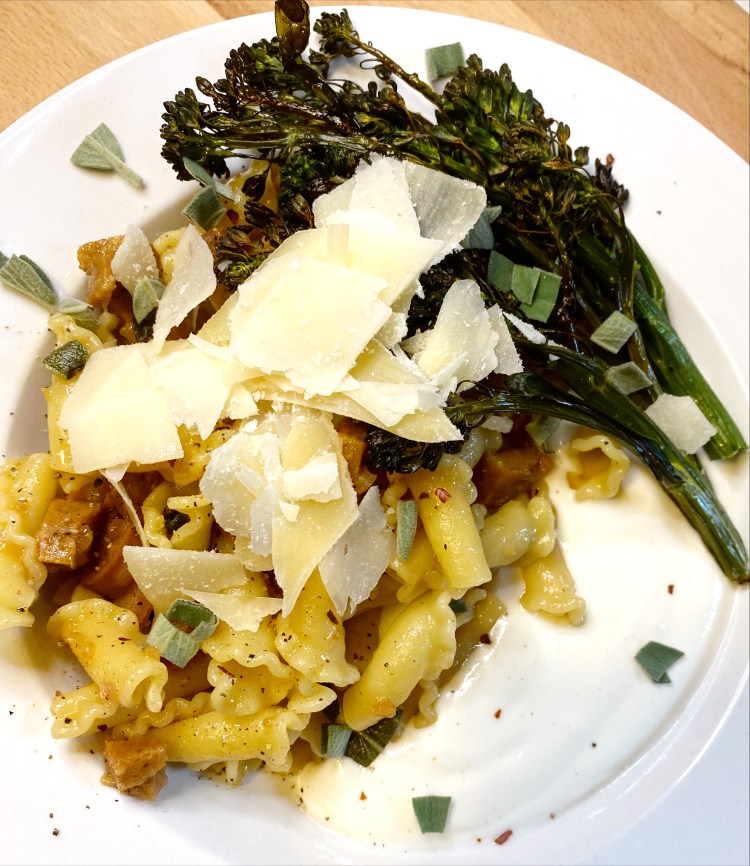
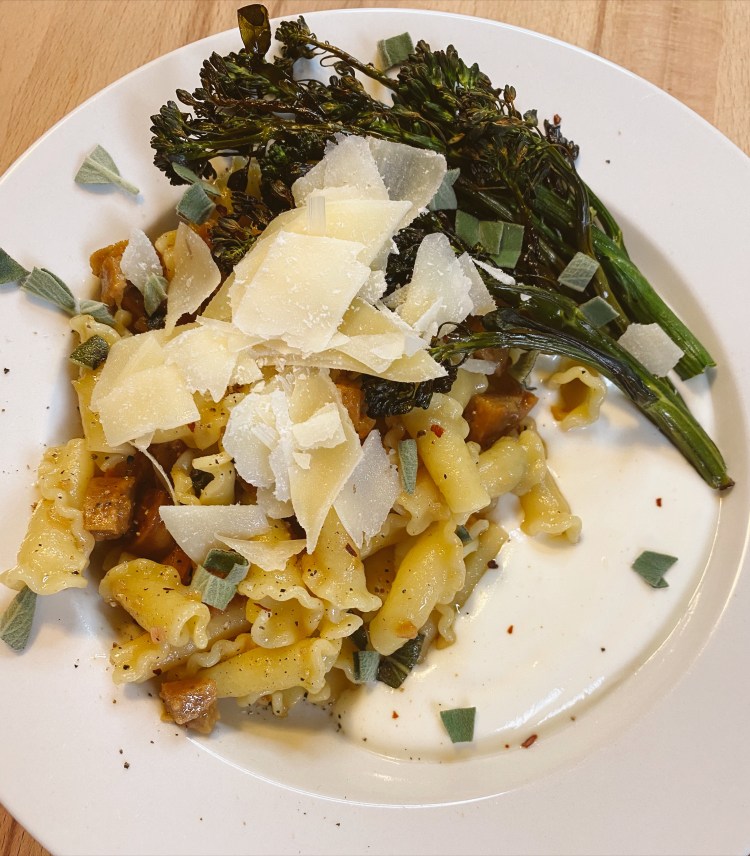
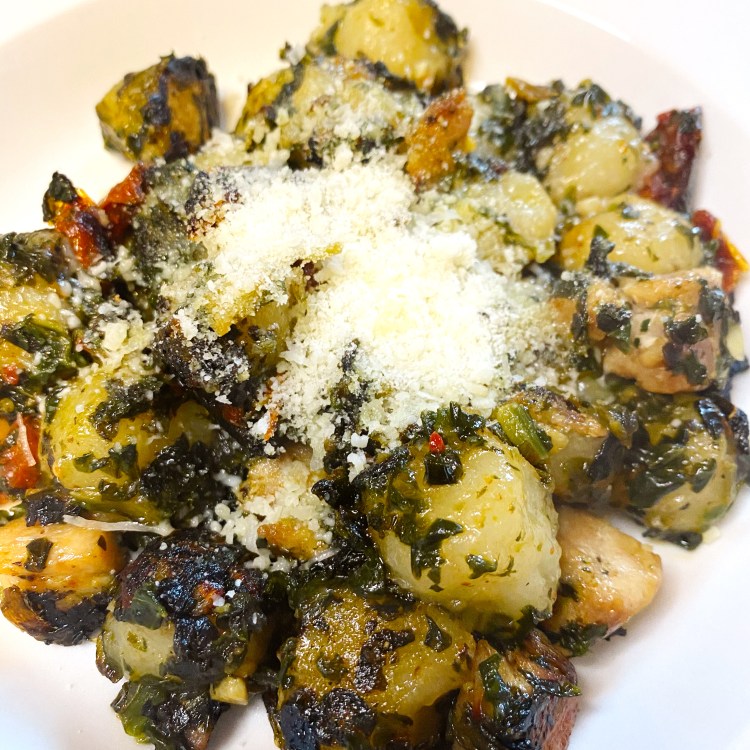
To plate: Spread half of the whipped ricotta over one side of your plate.  Place pasta on the other half of the plate, partially overlapping the ricotta.  Place broccoli rabe across the pasta.  Garnish with remaining fresh sage, parmesan cheese, and crushed red pepper.  Salt and pepper to taste.  

Red Pepper, Cauliflower, and White Bean Soup

I’ve been trying to eat as clean and plant based as possible lately, just because I feel like my body needs it right now.  This soup was super hearty and filling, and was made from only veggies and white beans.  If you’re looking for an easy and cozy weeknight vegan meal, give this soup a try.  

What you need (serves 2): 

▫️1 cup sweet peppers (I used mini red and orange)  
▫️1 cup grape tomatoes  
▫️1 clove of garlic 
▫️1 cup cauliflower 
▫️2(ish) ounces of red onion
▫️1 can navy beans, rinsed 
▫️Vegetable stock 
▫️2 tbsp Canola oil (or cooking oil of choice)
▫️Salt and pepper
▫️Fresh basil (garnish) 

In a large skillet, add 1 tbsp oil, tomatoes (whole), and garlic (roughly chopped into large pieces).  Salt and pepper.  Cook for about 5 minutes or until tomatoes and garlic start to brown.  Transfer the tomatoes and garlic into a blender.  

In the same pan (no need to clean between steps here), add the rest of your cooking oil and the finely chopped peppers, cauliflower and red onion, and more salt and pepper.  Cook for about 5 minutes, stirring occasionally.  

Add the entire can of beans and cook for another 5 minutes, stirring occasionally.  

Scoop half your veggie and bean mixture into the blender.  Add about 1 cup of vegetable stock to the blender, and begin to blend.  If the mixture is not liquifying, slowly add more stock.  You want to reach a thick, soupy consistency, but not to the point of watery.  

Add the blended ingredients back into the pan.  Cook for about 3 minutes to combine.  Serve immediately with fresh basil or garnish of choice.  

Crockpot Beef Burgundy

You’ll love how simple this dish is to prep in the morning, leave, and enjoy at night.  The secret: the crockpot!  Low and slow is the key here – the longer you cook, the better it will turn out.  

I used a top round sirloin for this recipe.  I cooked for my parents, and my mom suggested she might try using brisket next time.  I am by no means an expert on different cuts of meat, but I thought the top round sirloin came out pretty well.  But try whatever you have/what’s available!  We served the beef with crispy sweet potatoes, which was a great compliment and allowed us to soak up the sauce. 

All you need:
▫️Top round sirloin roast (or meat of choice) – at least one pound
▫️1 shallot
▫️3 tbsp canola oil
▫️cayenne pepper
▫️6 oz can tomato paste
▫️2 cups red wine
▫️Beef stock
▫️Salt and pepper
▫️Fresh parsley (garnish)

Side potatoes:
▫️3 sweet potatoes (yams)
▫️Avocado oil
▫️Dried rosemary

In a large skillet, add oil and chopped shallot on medium-high heat.  While the shallot is starting to cook, pat dry the meat with a paper towel, and LIGHTLY sprinkle cayenne pepper on one side (a little cayenne will go a long way.  We want the flavor and some warmth, not a ton of spicy heat).  Salt and pepper that same side, and place it seasoning side face down in the pan on top of the shallots.  While that side is cooking, season the top side of the roast.  Sear all sides of the meat for a few minutes until you can see it getting crispy.  (NOTE: we are not cooking the meat all the way through – just searing the outside for some crispy texture) 

Transfer your meat and shallots to a crockpot.  Cover the meat with a thick layer of tomato paste.  Pour in the wine, and then fill the crockpot with beef stock until the meat is almost covered.  Cook on high for 4 hours, and then on low for at least two more hours.  Cook on low for longer if time permits (max 8 hours).  Every few hours during the cooking process, ladle some of the cooking liquid onto the meat.   Toward the end, the meat should start to easily pull apart with a fork.  This is how you know it’s almost done!

For the potatoes: peel and chop your sweet potatoes into 1-inch pieces.  Spray a baking sheet with avocado oil, then place the potatoes on the baking sheet.  Spray the potatoes with more avocado oil.  Season with salt, pepper, and dried rosemary.  Bake at 350 for 45-60 minutes, flipping the potatoes on your pan and checking them every 15-20 minutes.  You want them crispy but not blackened.  

To plate: put the potatoes on one side of your bowl, meat on the other, and cover with some sauce.  Garnish with fresh parsley.  

Butternut Squash Pasta

This simple pasta dish was inspired by my need to use up leftover butternut squash and spinach, as well as to satisfy a craving for pasta.  I was not disappointed with the result.  This dish turned out creamy and filling, and it was perfect for a rainy night in.  Serves 1, multiply as necessary.  

Sauce:
▫️1 cup chopped butternut squash
▫️1-2 cloves of garlic (depending on your love for garlic)
▫️1 tbsp nutritional yeast
▫️1 oz soaked cashews (soak in hot water for at least one hour, longer if you can)
▫️1 tbsp canola oil

Additional Ingredients:
▫️1 cup (uncooked) pasta of your choice 
▫️1 cup fresh spinach 

Chop the butternut squash into roughly 1 inch cubes.  Add 1/2 tablespoon of canola oil and salt and pepper to taste, and cook on medium heat for approximately 10 minutes, or until softened. In a separate pot, boil water for pasta.  Salt the pasta water, and cook pasta for 8-10 minutes, or until al dente (cooked, but firm). Occasionally add a few tablespoons of pasta water to the squash to help steam and soften it.  Add chopped garlic to the squash and cook for an additional 5 minutes.    

In a blender, add the cooked squash and garlic, the other 1/2 tablespoon of canola oil, soaked cashews, and nutritional yeast.  Also add a half cup of pasta water.  Blend while slowly adding pasta water until you reach a creamy, saucy consistency. 

Strain pasta and return it to the vegetable pan.  On low heat, add fresh spinach and mix, allowing spinach to wilt.  Turn off heat, add sauce to the pasta, and mix.  Serve immediately.  Top with crushed red pepper and fresh black pepper, to taste.

Jackfruit 2 Ways: Nachos & Tacos

Jackfruit is a large tropical fruit that is sweet and fruity and that can be eaten plain, or, when prepared properly, can substitute for shredded meat because of its texture.  It’s a production to open a fresh jackfruit, so I’ve found the canned version from Trader Joe’s is perfect for cooking.  If you’re not quite ready to sub out your favorite shredded chicken or pork for jackfruit, feel free to use the jackfruit sauce below on your own shredded meat instead. 

What you need: 

Jackfruit

▫️10 oz canned Jackfruit, drained (1/2 can)

▫️1 tbsp Canola Oil

▫️1 tbsp Lime Juice  

▫️1 tsp Coconut Aminos (or soy sauce) 

▫️1 tsp Sriracha sauce

▫️1/2 tsp Cayenne

▫️1/4 tsp Cumin

▫️1 clove garlic  

Let the jackfruit dry on paper towels for at least 30 minutes to remove excess moisture.  Mix the canola oil, lime juice, coconut aminos, sriracha, cayenne and cumin.  Chop the jackfruit and garlic.  Add to a pan with the sauce mixture.  Sauté until the liquid is absorbed and the jackfruit starts to crisp.  

Vegan Queso

▫️1/2 cup soaked cashews

▫️2 tbsp Canola Oil (or EVOO)

▫️1 tbsp Lemon Juice

▫️2 tbsp nutritional yeast

▫️1 clove of garlic 

Blend all ingredients on high. Slowly add warm water if necessary to reach desired consistency.  

Mango Salsa (mix all ingredients): 

▫️1/2 cup chopped mango

▫️1/2 cup chopped tomato 

▫️1/2 jalapeño, chopped 

▫️1 tbsp finely chopped red onion 

▫️1 tbsp lemon juice  

▫️Fresh cilantro 

▫️Salt and pepper 

Guacamole (mix all ingredients): 

▫️1 avocado, smashed

▫️1 tbsp lemon juice  

▫️1/2 jalapeño, chopped 

▫️1 tbsp finely chopped red onion 

▫️Fresh cilantro 

▫️Salt and pepper 

Nachos

– Layer chips of choice on the bottom of a cast iron skillet.  Then top with the jackfruit “meat” and 1/2 cup of rinsed black beans.  Broil for approx. 3-5 minutes.  

– Spread mango salsa over the chips, then drizzle the vegan queso.  Top with guacamole and some extra fresh red onion, jalapeño, and cilantro.  

Tacos

Warm 3 organic corn and wheat tortillas.  Layer the jackfruit meat, black beans, salsa, queso, and guacamole in shells.  Top with fresh red onion and cilantro.  

Fire Cider

Apple cider vinegar is a well known and widely used tonic to improve overall health (a quick Google search will give you a lot of information if you’re not familiar). ACV is useful as an aid in digestion, reduces bloating, and boots your immune system, among many other benefits. Fire cider is ACV that is infused with many superfoods and other ingredients that can benefit your overall health even more than traditional ACV alone. I was introduced to fire cider a few years ago, and it has turned into a staple in my home. Particularly with cold and flu season on its way (or already upon us…), a shot of fire cider is a once (or multiple times) daily habit for me.

Yes, fire cider is spicy af.  Just like when you’re cooking, sometimes you get peppers that are spicier than others. Same holds true here, so some batches come out spicier than others. But generally, yes, it has a kick to it that is surprising the first time you take it. However, I’m pretty confident you’ll learn to enjoy it. And if not, its one shot a day and it’s good for you – you can handle it.

There’s many recipe variations out there, but this is how I make mine:

▫️lemon
▫️orange
▫️ginger root
▫️turmeric root
▫️horseradish root
▫️jalapeño
▫️habanero
▫️fresh rosemary
▫️black peppercorns
▫️white onion
▫️garlic

You also need a 32 oz. jar of apple cider vinegar with the mother. This is the unfiltered version, and it looks cloudier than the filtered version.

****Wear gloves while you’re preparing!**** First, peel and roughly chop all the ingredients (minus the rosemary and black peppercorns) and place in a blender. Pulse the ingredients a few times until all super large pieces are broken down.

Pour all contents into a glass jar that is at least 64 ounces. Insert the sprigs of rosemary and black peppercorns, and then fill the jar the rest of the way with ACV (it’s okay if you don’t use your entire 32 oz. jar).

Cover with either plastic wrap and a rubber band to secure, or place parchment paper between the jar and the metal lid. Do not cover with a metal lid directly. Store in a cool dark place for 30 days.

After 30 (ish) days, you will strain the liquid into a 32 oz. (or whatever size you have) jar. My way may not be the best way, but it’s the most effective way I’ve found thus far. I use cheese cloth and a funnel (see below). It takes a few minutes, but it’s the least messy way I’ve done it so far. Put the cheese cloth over the jar of fire cider and slowly pour the liquid into the funnel. Once most of the liquid is out, start pouring the chopped (pulp) contents and squeeze the remaining liquid through the cheese cloth. Again, WEAR GLOVES for this step!

This version made a full 32 oz. of fire cider. Just for arguments sake, I calculated my total costs, and it came to a total of $8.76 for the 32 oz. bottle. I used to purchase my fire cider, and the brand I bought costs between $12.99 – $14.99 depending on the store for an 8 oz. bottle.

Not only is it cost effective to make it yourself, but I personally prefer this recipe that I’ve developed better than store bought. You can find many recipe variations out there, so I encourage you to experiment and see what you like best! Stay healthy 🙂

Rigatoni with Cashew Alfredo, Asparagus, and Mushrooms

This cashew alfredo sauce is, to me, just as satisfying as the traditional.  It’s creamy, hearty, and  definitely a go-to when I feel like I need some comfort food.  What you need (serves 3-4): 

▫️6oz Rigatoni (uncooked, approx 3 cups cooked pasta)

▫️6oz IMPOSSIBLE ground “meat” (or ground beef/turkey)

▫️1 small shallot  

▫️Mushrooms (approx. 1 cup – I used a blend, but any variety will work)

▫️Asparagus (approx. 1 1/2 cups chopped into 2 inch pieces)

For the alfredo sauce: 

▫️1 clove of garlic 

▫️1 cup cashews (soaked for at least one hour) 

▫️1 tbsp nutritional yeast

▫️1 lemon (juiced)

▫️Olive oil (or EVOO)  

Start by cooking the meat until browned (no oil necessary).  Set aside.  

Dice the shallot and sauté with mushrooms in olive oil on medium heat until the mushrooms are almost completely cooked.  Add the chopped asparagus and continue to cook on medium heat.  At the same time in a separate pot, cook pasta in salted water, and save some pasta water.

Make your sauce: strain the cashews and blend with nutritional yeast, juice of one lemon, garlic clove, about 2 tablespoons of olive oil, and about 1/2 cup of water.  Blend until creamy.  Slowly add water as necessary until you achieve a creamy, saucy consistency.  

Add the meat to the pan of vegetables. Then also add the cooked pasta and sauce.  Mix together and slowly add pasta water to loosen up (if necessary).  

Salt and pepper to taste. Serve with crushed red pepper, if desired. 

One-Pan Cauliflower Gnocchi

So my mom asked me the other day if I had room in my freezer for a turkey (standard mom question).  I currently do not, but of course, I’ll do whatever she wants.  Therefore, this meal was the product of cleaning out the freezer.  This recipe is also one that is very forgiving and can easily be modified based on your preferences or what you have on hand.  Another goal for this meal was easy clean up, so this is all done in one pan.  What you need (serves 2): 

▫️1 bag of Trader Joe’s frozen cauliflower gnocchi (these are so light, delicious, and versatile, I usually keep at least one bag in my freezer at all times) 

▫️4-6oz chicken thighs (I used a portion that I had, guessing on my measurement. More will not be a bad thing if it’s what you have on hand)

▫️1(ish) cup chopped frozen spinach (I used the rest of a bag I had in the fridge, so it may have been more)

▫️3-4 tbsps chopped sun dried tomatoes (in oil, and save the oil)

▫️1 clove of garlic

▫️EVOO

▫️Parmesan cheese (to garnish) 

▫️Salt and pepper

Cut the chicken thighs into 1-inch pieces. Cook in approximately 2 tablespoons of EVOO on medium-high heat and season with salt and pepper.  Cook chicken completely.  

Add the chopped spinach, sun dried tomatoes, and garlic to the pan and continue on medium heat, stirring occasionally.  Also add some of the oil from the sun dried tomatoes.  Cook until spinach is totally defrosted and beginning to cook down.   NOTE: The oil that the sun dried tomatoes are packaged in is full of flavor and usable!  Try adding it to your cooking whenever sun dried tomatoes are involved.  

Add the frozen gnocchi to the pan and mix everything together.  Add 1/2 cup water and cook on medium heat, covered, for 6-8 minutes, stirring occasionally.  I personally like to cook for another 2-3 minutes on high heat, stirring only once or twice, to add some crispness and texture.  Cook to your desired texture, being careful not to burn.  Top with parmesan cheese, and enjoy.   

NOTE: If I had mushrooms on hand (and also if I wasn’t cooking for my sister who does not like mushrooms), I definitely would have added them in and sautéed with the spinach, tomatoes and garlic.  Mushrooms would make a great addition to this dish.  

Zucchini Lasagna

You’ll think this lasagna is just comfort food, but it’s filled with veggies, and actually quite healthy (well, in my opinion at least).  

This particular recipe is vegan because that’s just what I’ve been feeling lately, but there are many modifications that you can make based on your preferences (explained along the way).  This can easily be made very non-vegan and still be packed with that veggie goodness.  Also note that I made a smaller portion using a 9x7ish pan (serves 2-4).  It’s just me over here, so making humongous portions is impractical.  However, the good news is that this recipe is very forgiving, and you can easily double it.  Also, if your measurements aren’t precise, it will still come out amazing.  

What you need: 

▫️1 medium (or 2 small) zucchini

▫️Lasagna noodles (I only used 4 traditional sized noodles)

▫️Marinara sauce of your choice (shoutout to all my fellow Buffalo natives who know Chef’s sauce!) 

▫️6oz IMPOSSIBLE ground “meat” (or ground beef/turkey/meat of choice)

▫️1 cup vegan ricotta (see a few posts ago for the recipe, or use traditional ricotta)

▫️1cup dairy free mozzarella (or traditional mozz) 

▫️4 tbsp vegan parmesan (or traditional grated parmesan)

▫️1cup frozen chopped spinach

▫️1 small shallot (optional) 

Sautee the IMPOSSIBLE meat (or whatever ground meat you’re using) and finely chopped shallots on medium heat until the meat is totally browned.  No need to use any oil in your pan.  NOTE: I love garlic and onion in pretty much everything, but if that’s not up your alley, you can skip the shallots.   While the meat is cooking, boil your lasagna noodles in salted water until they’re al dente (firm).  

Slice the zucchini in 1-2mm slices.  This is much easier if you have a mandoline, but I just sliced carefully.  Set the zucchini on a paper towel to absorb some of the excess moisture until you’re ready to assemble.  

Mix the ricotta, 1/2 cup of mozzarella, 2 tablespoons of parmesan, and frozen spinach in a separate bowl.  Set aside.  

Once your noodles and meat are cooked, you’re ready to assemble.  

Start with a layer of sauce on the bottom of your pan.  Next, add a layer of sliced zucchini. 

Add a layer of the cheese mixture.  

Then, add a light layer of the meat mixture.  

Add a layer of lasagna noodles, then more sauce.  Repeat until all your ingredients are used up, or until you’re at the top of the pan.  If possible, try to end with noodles and then sauce as your final layers.  

Cover with the rest of the mozz and parmesan.  Bake covered.  I baked at 325 for one hour, but keep in mind that if you’re making a larger portion, you will want to cook for longer.  Luckily, all the ingredients are fully cooked; we’re baking only to soften the zucchini and melt the cheese.  Just keep checking on it – it should start to bubble on the sides, and the edges of the noodles that are peeking out will get a little crisp.  Finish in the oven uncovered for an additional 10 minutes to brown and crisp the top layer of cheese.  

I served with some extra sauce and red pepper flakes.  Feel free to also throw some extra cheese on top as well, just for good measure 🙂 

And also, if you were wondering how I had the perfect proportions and quantities of all my ingredients to fill my pan exactly…. I definitely did not!  I chopped and sautéed the leftovers for a little pre-dinner snack!  

Butter Lettuce Salad

This simple butter lettuce salad is one of my go-to’s when I need a big dose of greens and not much more.  I know a lot of people like to drink their greens for efficiency, but I’m just not a big fan of smoothies because I never feel like they’re a satisfying meal for me; so I typically go the salad route for my fill of hearty greens.  For this simple salad, all you need is: 

▫️Butter lettuce

▫️Baby Bok Choy

▫️Endive

▫️Avocado

▫️Microgreens 

For the dressing: 

▫️Grapeseed oil (or EVOO)

▫️Lemon juice

▫️Dill

Clean and chop the butter lettuce, endive, and bok choy.  You can really use any combination of greens you prefer, I just happen to LOVE butter lettuce, and I’ve found this to be a hearty and tasty combination.  Top with half an avocado sliced into fans, and a pile of microgreens.  

For the dressing, combine in a small container the juice from half a lemon (approximately 1 tablespoon), about 2 teaspoons of oil, and one teaspoon of dried dill weed.  Shake vigorously for 2-3 minutes.  Immediately pour over your salad and enjoy. This dressing is very light and flavorful, and it keeps your salad clean and healthy while still doing the job of a salad dressing by adding flavor.